In this tutorial, you will learn how to turn on the voice chat feature in Roblox.
The first thing you need to do is to log in to your account on ROBLOX.COM
Once logged in, go to the settings by clicking the gear icon at the top of the screen. Under account info, you will see your birthday information.
Age HAS TO BE VERIFIEDIn order for voice chat to work within Roblox you MUST be 13 years or older on the account AND have your age verifed.
In order to get verified through Roblox you must click the VERIFY AGE button below your birthday in settings. It will take you to a 3rd party site that will allow you to take pictures of your ID.
It looks like this:
Once you have taken a picture of your ID (Can be Drivers License, Passport, School ID) you will be redirected back to Roblox.com. Once you have verified your age, there are two more things that MUST be on the account.
A verified EMAIL ADDRESS and PHONE NUMBER.
Above your birthday you will see places for an Email Address and a Phone Number. Make SURE that you have these added and verified. Just type them in and then verify via email/phone number and you are good to go.
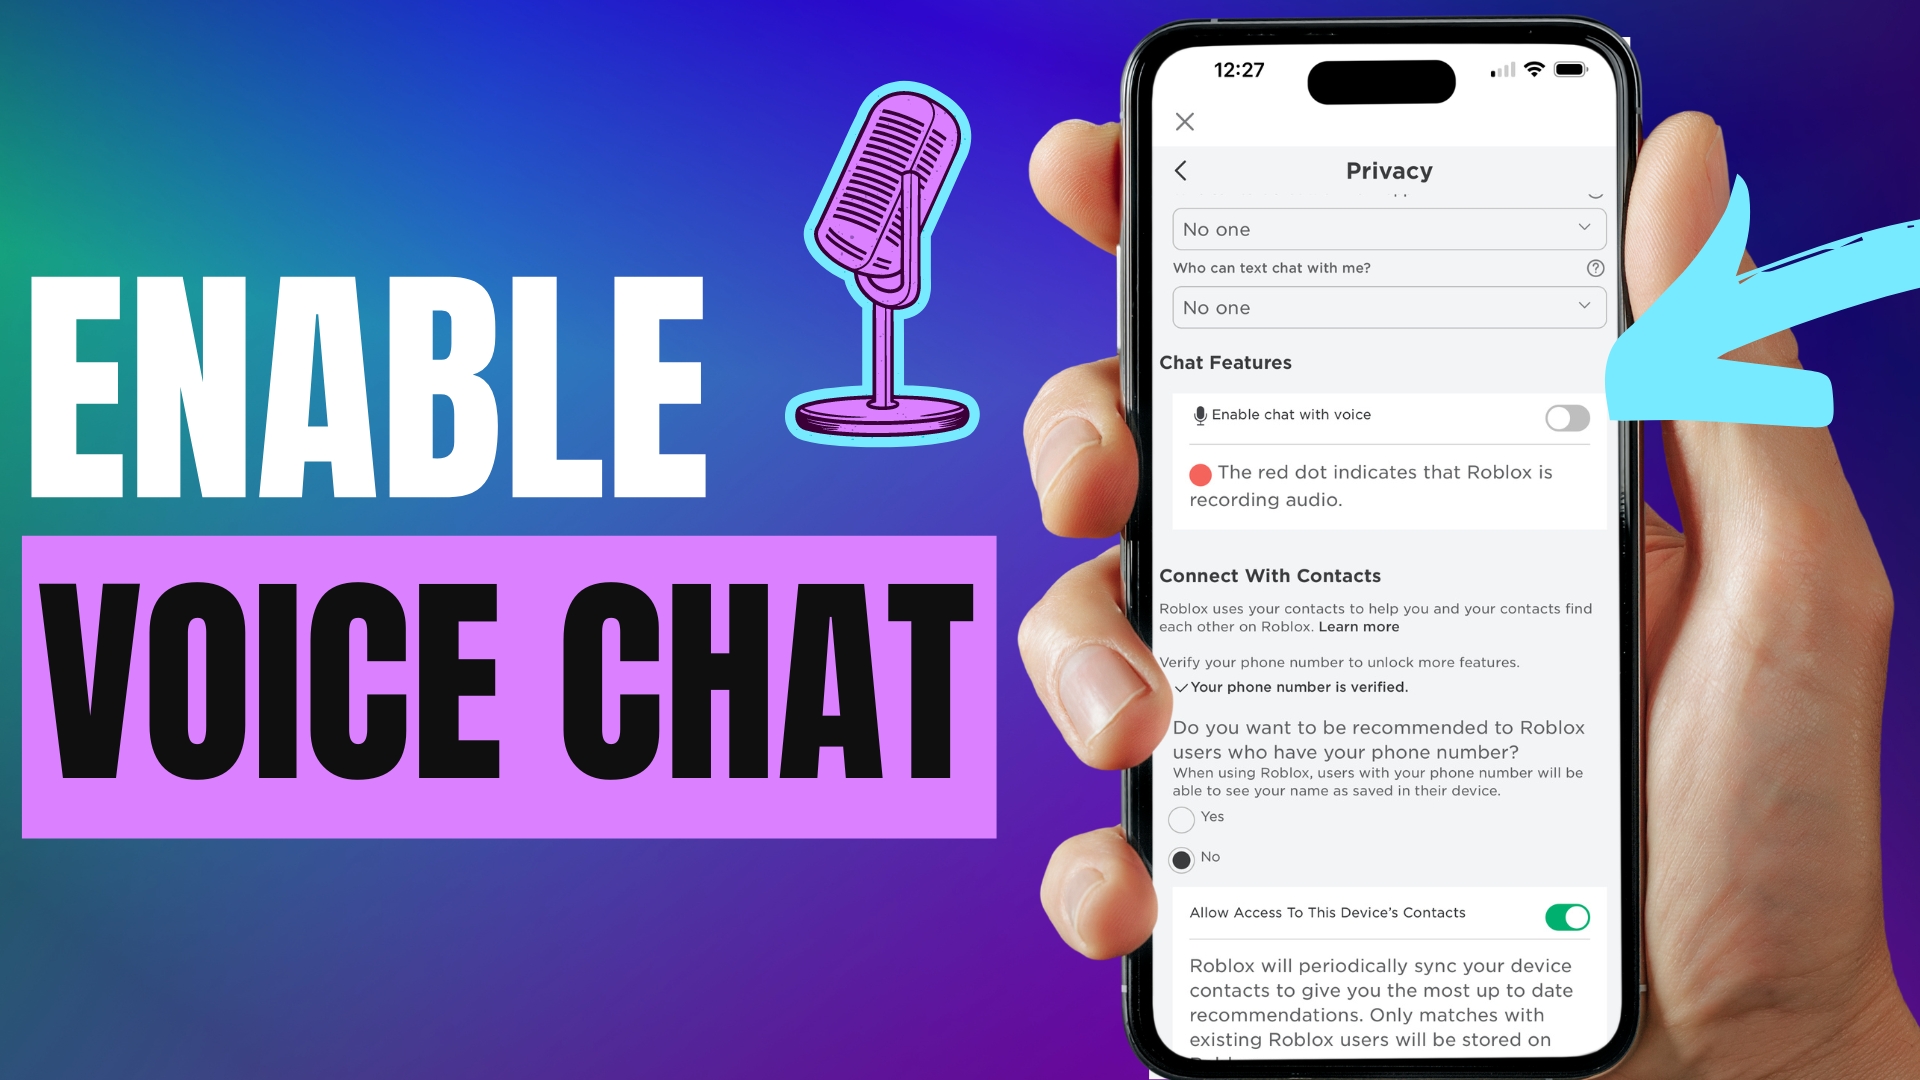
Now that you have done all of the above, you will go to PRIVACY settings. Click the Privacy time now under MY SETTINGS.
Now the only thing left to do is to enable Voice Chat. Just click the box next to Enable voice chat under Beta Features. Once it is ticked over to green you are good to go!
To see who is using/or can use voice chat they will have a microphone icon next to their name.
The levels/apps that are able to use voice chat will also have that notified and you can even create a search filter for ONLY voice chat enabled games.


Leave A Comment